RSS

Part Five: A piece of my own

BRIEF:

(1) Design & make a textile piece of my own;

(2) that could be part of a larger piece;

(3) using ideas from previous exercises;

(4) possibly combining techniques;

(5) providing an overview of all the (design) elements, integrated to form a dynamic relationship with each other;

(6) the completion of an end product is not required;

(7) consider size, purpose, function, site specific, form and structure. 

The starting point for part five after laying out all my samples, sketchbooks and drawings was contrived from assignment one ‘mark-making’.

I started by using the idea of ‘mind mapping’ (see working notebook) to isolate and record my initial thinking as I worked through each of my folders.

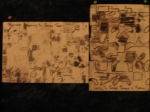
In the first instance I used the ‘mark-making’ exercises  worked with pen, pencil and charcoal, moving on to mark-making in colour with gouache paints and free-hand machine embroidery using solvy and discarded sewing threads.  The flash from the camera has produced a differentiated texture and a light and dark structure.The types of marks made on the paper limited this exercise to the medium I was using. I fully intended to follow this process  through to a state of exhaustion knowing that I had  other source material and tools I could use if the above proved unsatisfactory.
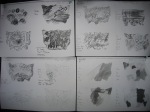
Depending on the distance that I was viewing the mark-making from and although the pencil is a versatile medium it lacked the impact that the charcoal could provide. Because the pencil is a linear medium, even when working fast it took time to build up density. Graphite/charcoal sticks/soft pencils proved to be quicker when used broadly and especially when using the sides of the medium. Unusual textures add character to mark-making for example when using frottage, various types of paint, sewing thread and wool felt. Photographs and photo copies lack the detail available by close inspection of the real thing unless notes are recorded at the time of the image being drawn.For this reason my choice of resource material would have benefited from visual and tactile sensations so that having been experienced first hand could have helped to demonstrate better the character of the materials.

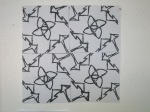
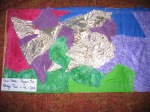
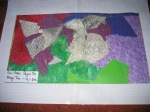
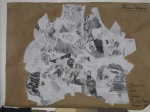
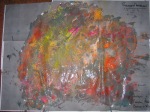
Herewith “two large drawings” one by way of cut up and woven collage and the other  a selection of chalk dust scattered on to a mixture of fabric paint and PVC to form an abstract rendition of the woven collage void of the black and white tonings and converted into a colorization abstract.

My preference was to weave together various design ideas from my ‘mark-making’ source material.There was part of me which said give it my best shot and see what evolves. I was using the suggestion made in the lesson notes that “this process continues through further stages of selection, development and evaluation until you arrive at a coherent workable idea, ready to be realised as an end-product.” The texture of the mark-making was visual and tactile in that the thin and thick strokes of the pencil could be seen and the dust of the charcoal could be felt with the finger tips as they were rubbed across the medium. These textures will be entirely different to those in the next stage of the design process where the images will be converted into a textile medium. This will be a process of interpretation rather than imitation. The reproduction of the textures in the paper woven tapestry by drawing and painting sharpens observation and enhances perception of the image. The overall effect of its form and shape however is secondary to an organic object.

Once I had cut up and re-assembled the ‘mark-making’ images I looked for design elements such as shape and form in the woven sample. My objective was to make a number of drawings and samples and be open to any alternative strong emerging ideas. (See sketchbook)

2/5/2012

I am asking myself why am I hesitant about my source material being of an abstract nature. The answer is because I have yet to see the results of the process of weaving the cut strips together.

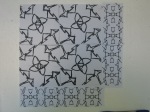
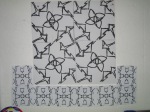
Using tracing paper I traced off a variation of shapes and objects from the rearranged and woven images of my original ‘mark-making’ exercises. I then cut out selected areas from each separate tracing and superimposed them one on top of the other to create a further rendition of the original paper tapestry. I have used out of focus photos so that the stark black lines/marks merge and fuse together to create an overall textural impression rather than perfect and clean outlines of the original shapes and forms. This will virtually eliminate hard lines helping the eye to see through rather than at the images.

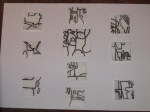
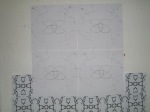
I then cut up 5cm squares of tracing paper and traced off a number of segments from the combined sheets of images so that each sample had a further series of different markings. (An alternative way to capturing segments of the tapestry is to cut out a 5cm X 5cm square window from cardboard and draw another copy of the markings that can be seen in the window). I then turned them over and penned the marks showing through on the back in black pen exactly as they were on the front.

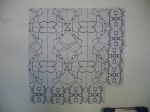
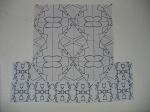
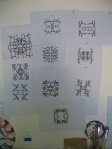
The next step was to take two photo copies of the front and back of each image making up a set of four. When placed side by side and because each quarter was a mirror image of the complementary quarter. I was very impressed and excited about the shapes, patterns and forms that were emerging from the source material as a result of the steps I was taking in the design process. I was able to end up with a series of slightly geometrical and symmetrical designs.
3/5/2012

The excitement of being able to recognise shapes and pattern in the designs immediately threw up the idea of a wall hanging or lap quilt because many of the designs suggested border patterns or if enlarged the central medallion of a quilt.

Off I raced, enlarging, cutting and pasting and putting together a design for a lap quilt from selected segments of the 5cm X 5cm designs. The possibilities were endless and the result, well not all that inspiring – requires some more thought put into it. The centre medallion needed to be evaluated in terms of the design elements and the border needed to be continuous and flowing rather than a series of one-off segments of the same design.
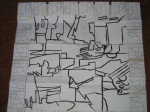
Rather than placing all the individual designs in the centre another option would be to enlarge one design and use it as the medallion and then run another design around the outside as a border.

4/5/2012

The variations are many and will need to be manipulated to ensure an acceptable outcome before moving on to applying colours and materials to the design. The patterns need to flow by removing excess marks and lines that have no function. The overall effect must be in balance and uniform. The outlines of each pattern can be straight or linear for such techniques as applique but for hand trapunto quilting or machine quilting they would work better if rounded.

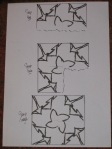
Re-worked one of the designs with more precision as to where the lines and patterns placed. It is now starting to look as if it is a better representation of the original. The process was by drawing, cutting and pasting on graph paper then enlarged and pasted into sequence as four quarters.

15/5/2012

More samples and redrawing parts of the various objects to achieve a better balance and less angles so that they appear less congested.

16/5/2012

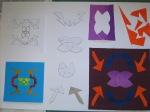
Introducing colour, making templates of the objects so that they can be cut out of ‘steam a seam’. The difference between ‘steam a seam’ and ‘vliesofix’ is that ‘steam a seam’ can be lifted up and repositioned.

17/5/2012

The steam a seam’ templates are then attached to the back of the selected fabric, cut out and placed on the right side of the base fabric after removing the layer of protection paper.

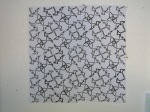
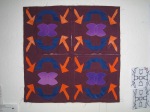
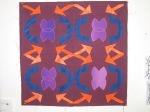
Because the four finished blocks have a 1/4″ seam around the design they can be pieced together to form one continuous block. This can be the finished centre medallion of a lap quilt, wall hanging, quilt etc., or more blocks can be added around with a border around the outside of all the blocks.

Finally the objects can be secured by a blanket stitch around each outline either by hand or machine.

21/5/2012

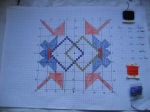
Redrafting the design on to graph paper meant that to meet the requirements of full and half stitch the squares on the graph had to be aligned to the original design. This meant that the design was not an exact replica of the original but kept the idea in tact so that the one block could be either duplicated or made into as many copies as required to finish the project whether it be a table-cloth, runner or framed as a wall hanging.

24/5/2012

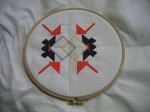
14 count Aida cloth was used but the stitching needed to be over two squares to ensure a reasonable size block such as 16cm X 16cm. A finished project would be either twice, three or four times the size depending on what was being envisaged.

It could be made in to a table mat or wall hanging or even framed by adding another block on all four sides and another four blocks in each of the corners. The white background could be filled in with a neutral colour.

1st June 2012

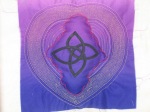
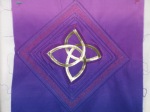
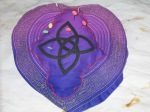
One of the samples has been made into a pin cushion. (on the right). The source material was modified a number of times, (see learning log and sketchbook for the process) with the final design using the traditional techniques of Italian corded work, Trapunto stuffed work, French cording and English quilting.

This would now need to be evaluated as to its quality of design, stitching and outcome. I am more than happy with the ‘final piece of my own’ because once I had progressed the design elements I felt I had achieved a minor goal towards fulfilling my ‘target piece’. I can see that parts of the stitching need to be secured better the central motif has some ‘kinks’ in it and the finishing work could be improved. The urge to improve the new techniques learned and to practice these skills has created a sense of having done well. I now want to document the steps in the process and build on the outcome by trying another design and perhaps a pillow or wall hanging.
 
Comments Off on Part Five: A piece of my own

Posted by on May 1, 2012 in Part Five: A Piece of my Own


Part Four: Learning Log.

PROJECT EIGHT:

Did you enjoy inventing constructed surfaces? – Yes, like a young child playing with Tic Tac Toe on an Apple tablet for the first time.

Were you surprised at the results? – Only those that didn’t end up as I had expected. Because I have had some contact in the past with working with odd materials all surprises were happy ones.

Can you see a connection between your choice of materials and the type of structures you made – regular, irregular, small or large-scale?  Having been involved in the Carpet manufacturing industry I had an immediate affinity with the weaving of Axminster and Wilton carpets (loop and cut pile). On a larger scale, my designs and  the designs created in the design room had immediate impact because of the 12′ wide runs and complexity of patterns.

Which sample worked best?  – simple repetitive designs and less than complex mixes of materials.

How accurate were you in matching all the colours in your image? – Compromise was an integral ingredient with paints and yarns/fibres so long as the shades and tones were complimentary.

PROJECT NINE:

Did you have enough variety in your collection of yarns and other materials? – No. Obviously I am going to have to search out more suppliers fora greater variety of yarns and fibres for more developed outcomes but for the work that I have just set out on I had sufficient to get a good idea of where the pieces are heading should I continue to work in this medium.

Which kinds of yarns, etc., did you use most? – Knitting and sock making yarns.

How do their characteristics affect the look and feel of each sample?  –  Much more condensed and compressed. More precise and complete in the detail of the design and smoother in their texture and softness to touch.

How did you find weaving in comparison to the other techniques you’ve tried?  – Much slower and demanding but more satisfying in that the wool and fibre textures had a sense of excitement as the pattern started to evolve. I can’t wait to get my own computer loom and acquire newer synthetic and non standard materials to work with.

How do you feel about your finished samples?  – Because I worked as ‘weave as you go samples’ rather than from my own designs, let down and disappointed in the outcomes. I need to be more resolved in my work. I will have to check but the size of my weaving frame may have been larger than the one I was asked to work on. I possibly should have been working on a smaller frame and completed more samples.

Are you happy with the relationship of the textures, proportions, colour and pattern to the finished size? – Only partially. Needs a lot more experimenting and working of other samples than I had the time available. I did succeed with plating, combining  and making non weaving objects. Was successful at using the Soumak weaving technique. Could try a lot more of these variations.

Is there any part you would want to change? – Yes I would want to change to more efficient tools of the trade rather than feeding the shuttle by hand and using cardboard for substitute bobbins. Also paper clips were not the best way to raise and lower the warp threads. Studying the basic techniques of weaving under supervision or at a workshop will help solve some of these problems.

How would you tackle this process differently another time? – Spend time studying and practicing how to join together lines of weft threads when the colours, types of yarn/fibre or contours change.

 
Comments Off on Part Four: Learning Log.

Posted by on April 20, 2012 in Part Four: Learning Log.


Part Four: Project Nine – Stage Four. Sample Two.

Making up a story board for this sample started with a brain storming session of understanding the word tranquil by way of word association. Roget’s Thesaurus helped to provide synonyms and spread the net far and wide in terms of related vocabulary.A better appreciation of the impact of the word meant that I did not become bogged down in my thinking.
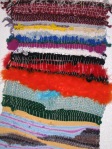
Finding examples was not that easy so I confined my self to the images supplied by google when surfing the internet. I’m sure that there would be other sources such as my photo album and sketchbook. The selected images were representative of and descriptive of my choice of pictures. for the word tranquil. By default the colours produced by my printer in the final stages of using up the coloured inks were indicative of the hues that I associated with my chosen word – pale, pastels, flimsy, low value shades and tones – quiet, unassuming but leaving a warm glow inside.

I chose more images than I really wanted to but that was in order to make them smaller, less significant and certainly not to dominate the overall effect of the story board. The pictures were definitely placed in order of importance in the life cycle of the overall sense of tranquility but also to convey the impression that creation and creativity came as a causal result of the ebb and flow of water whether it be in the rivers, ponds or the sea.

Selection of fabric, threads yarns and fibres were more difficult to arrive at from my restricted sources. The fabrics with unobtrusive colours and the ‘washed about’ effect off the water-colour paints were indicative only. I tended towards choosing weaker than stronger values of colour. However I had a better feeling and affinity for the merino felting wools and had a sense of gloating as I placed them in their envelopes and attached them to the mood board.

The story and mood boards were starting to feel more in keeping with the design principles than some of my more recent work especially through the development stages. Perhaps there could have been more work in my sketchbook to aid the design process. I felt more inspired with these samples than I have done in the earlier exercises.

 
Comments Off on Part Four: Project Nine – Stage Four. Sample Two.

Posted by on April 19, 2012 in Part Four: Project Nine - Stage Four. Sample 2.


Project Seven: Theme

FAMILY VIOLENCE:

Pig Intestines: (A Happy Accident)

I thought that if I could acquire some pig intestines that I would be able to convert them by way of either weaving or crochet to some form of creative textile artistic form. I tracked them down eventually to a pig slaughter house -the staff were beside themselves with laughter and curiosity.

“THEY STINK” to high heaven. The smell alone will not allow them to be any where that requires clean air, let alone offer them as evidence of my work for assessment.

From the outset I imagined that I could dry them in some form of solution containing salt so that they would be cleansed sufficiently to be used as either a decoration or in mixed media.My first mistake was to wrap them up in tin foil so that they would dry out. Not so, but the maggots were of the larger variety.

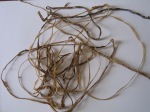
So I had achieved some small gains for my efforts – not that that was what I was aiming for. The second mistake was surfing the internet for information on curing them. Not so but I did find that they are a delicacy in China and very helpful in how they should be prepared for the meal table YUK! I have the sense that they perhaps should have been used in their wet state and if I delve further into using them will try working with them before drying them. Any how, they dried a dark greyish colour, shrunk down to a thin rubbery string-like fibre and stunk to high heaven. The membranes did stick to the base strand of intestine forming appendages along the length of the grisly flattened out tube.

To cut along story short the moral of which is ‘start with a design from ones source material’ is to build up the evidence of how to go about resolving the final outcome before choosing the materials.

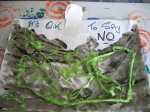
One of my themes is going to be ‘Family Violence’ and the saying that goes with it – “It’s OK to say NO”. What better way of using the dry intestines than adding gesso and acrylic paint together and dipping them in it so that they can be attached to the source material. It’s worth a try – at least the stench will convey a message that Family Violence is not OK but the green colouring gives permission to say that it is OK to say no to family violence.


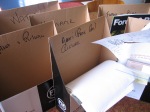
So that I can collect paper cuttings and other material I used filing boxes to put these in until such time as I was ready to work on a particular theme.

 
Comments Off on Project Seven: Theme

Posted by on April 17, 2012 in Project Seven: Theme.


Part Four: Project Nine – Stage Four. Sample One.

DEVELOPING DESIGN IDEAS INTO WEAVING

 At last source material from Part Three: Project Six, that lends itself to being woven.

Stage Two of Part Four – developing ideas suggests choosing source material that is not too complicated but has an expressive quality and rhythm. It talks about using part of the material, changing the colours, reorganising shapes and introducing plain, patterned and repeat areas.This was the subject of contention referred to by my tutor in assignment three. In this situation the source material did not require any of this development as it was perfect for being produced in woven form.

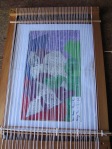
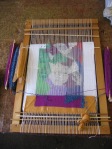
Took a short cut and had a  coloured photo copy of the sample enlarged so that it fitted within the breadth and depth of the weaving frame. Stapled the image to a piece of graph paper to represent the outcome as if I had drawn the outline of each block on to the surface of the paper and then painted in the blocks with the equivalent colours. I could have used a light box to transfer the blocks or I could have drawn a grid over the blocks and then transferred the ‘marks/outlines’ to the graph paper. All methods would have achieved the same result. The colours were vibrant with some luminosity.

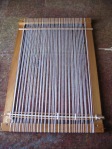
 Decided to warp up the frame with the same number of strands of light weight yarn that I used for the first woven sample. Thought about changing to a different yarn type as well as variegated colours but decided to leave the variation untill a later sample. I was determined to avoid the problem of the warp threads showing above the weft threads and allow them to create the surface qualities by way of texture and type of yarn used.

Decided to try paper clips fastened to the lower warp threads and using a piece of dowel across the face of the frame so that I could simply pull the lower warp threads up above the top warp threads rather than bringing them up singly with a  ruler. So frustrating picking up each warp thread and so time-consuming every second row of weft. Have now tried using a bevelled edge  ruler and it works especially where there are a number of different colours along each row of weft.

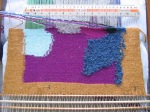
 The design decisions were driven by the blocks of colour in the source material. Identifying and selecting the appropriate colour yarn came down to what I had available and what I could obtain from other sources. Here’s where looking at other students and artists work becomes overwhelming. You hit on an idea and then lo and behold find that some one else has got there before you. The paper clip idea  worked for me until that is I got to changing the number of colours in each row. I fell back on using my trusty ruler to pick up each warp thread. It did have bevelled edges so that they slipped easily under each thread. Not so a blunt ended shed stick or bobbin. For this sample I used mainly knitting wools and frankly the constant back and forwards of the loaded bobbin was very satisfying. But trying to ‘but’ the ends of each colour alongside each other in a row was a nightmare. Ended up getting a book on tapestry weaving out of the local library. This proved to be very detailed but also very helpful because of its clear step-by-step approach. “Tapestry Weaving” by Nancy Harvey published by Interweave Press in 1991. The piece of work in the above photo took me two hours plus setting up time. So on the basis of the size of the frame there is another six or so hours to finish the piece.

In the book the calculations of how much yarn would be needed for any given piece of weaving were very precise and were much help in working out how much yarn would be needed to complete a piece of tapestry. My calculations were as per the formulas but my usage was anything but. Had something to do with the variables of skeinage and weight of yarns/fibres. Finding the volume of any given ‘object’ in the source material was questionable also. Another variable was the tension of any row of weaving especially when changing from one colour to another. Gaps started to appear between each warp thread and had to be basted together. Not sure how this will end up though when the piece of tapestry is cut from the frame.My samples in the beginning were looped alternatively around each warp before changing direction. I will be working to solve this problem as I weave further up the frame. Reverse weaving (unpicking) was my speciality at the beginning – but how else does one learn – only be correcting ones mistakes.

I have no intentions of changing the basic design only persevering with the weaving and correcting my mistakes. As the notes in the lesson suggest – you can only make a fair judgement when the design is completed – whenever that will be.

 This sample is quickly become a case of perseverance and technique  perfecting. Visually it can be seen where the matching and joining of colours could be improved as well as the tensions being equalised. Saying that the variation in the tensions are allowing for the creation of different textures as does the use of varying weights and types of woollen yarns. The time factor alone has led to being clearer in my mind as to a daily/weekly timetable in order to progress other parts of the lesson and keep the due dates for work and assignment presentation on course.

 
Comments Off on Part Four: Project Nine – Stage Four. Sample One.

Posted by on April 5, 2012 in Part Four: Project Nine - Stage Four. Sample 1.


Part Four: Project Nine – Stage Three.

EXPERIMENTING WITH DIFFERENT STRUCTURES

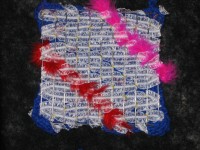
Just in case I forget here is the back side of the first sample of textile weaving.

The materials were vast and varied as were the outcomes. As mentioned previously the warp threads are obvious and I need to work out how to make them more invisible and the finished piece needs further work on how to finish off the hanging weft threads. There is a combination of materials making for an interesting texture and finish to the piece. Primary colours are predominant and lift the visual impression where they are in a greater proportion to the secondary colours.Placing the weft through the shed with the fingers was not used as much as a threaded sack needle when appropriate that is the material was too thick to go through the eye of the needle. Loft and heighth was achieved with un cut pile and thick cord knotted around the warp threads.

 
Comments Off on Part Four: Project Nine – Stage Three.

Posted by on April 4, 2012 in Part Four: Project Nine - Stage Three.


Sketchbook

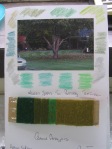
This time I will try another sample of colour analysis from a photograph.

The season being autumn I have chosen some lesser than warm colours in various shades and tones of green. These green colours are both ends of the spectrum that is blue/green and yellow/green.The photo has a matt finish to it so that the greens are more muted and dull looking than than they appear in natural day light. Not only have I used water coloured paints but also snippets of images from coloured magazines and yarn wound onto cardboard in approximately the same proportions as in the photo to show the relationship between the photo and the materials.

Water colours have a serenity about them when being applied which helps me to develop a fairly standard format as suggested in the lessons but I want to vary my way of analysing colour perhaps by trying a drawing/sketch and using a variety of materials and fibres.

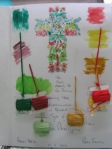
Still with the autumn shades but introducing some warmer colours such as red and yellow. By taking a series of flower shapes and sketching them in pencil I added the full strength colours from water coloured paints. The slender and spindly lines suggests I use a lower denier of thread and I have chosen DMC thread shades which match the colours in the drawing. The warm reds and yellows contrast strongly with the cool greens and all their different tones. The duller greens stand out in intensity because of their clean cut lines, especially their outlines and hash texture markings. The greens appear darker because of the value of the yellow and reds surrounding them.

I tend to work intuitively rather than by analysis of the concepts of colour and techniques other than collage. It still is and will for some time yet be a voyage of discovery for me as a student. I hope that I never stop learning something new.

 
Comments Off on Sketchbook

Posted by on March 15, 2012 in Sketchbook


Part Four: Project Eight – Stage Two. Exercise Four.

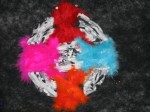
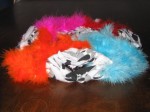
Following the instruction  “start with rigid materials” to the letter,I went looking for a recycled  wire bird-cage, thinking that it had a variation of rigid wire sides which I could adapt to using for ‘trellis type weaving’. I ended up with various other wire framed trellis’ which I used for filling in the spaces to create solid and open areas – photos of  samples herewith.

All samples have been worked randomly with no specific design in mind – as the imagination took me so the weaving took shape. The preset pattern of the wires did dictate to an extent the outcome of the weaving of the fibres. Colours were important in that they gave the image vibrant appeal. Not just yarns but more outlandish material was used such as faux fur with a strong cord running through its fibres. This meant that it was able to be threaded through the wires and also secured by hand stitching.

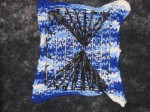
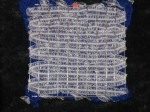
The background in two of the samples was knitted patterns of Peggy squares. I have the sense that my samples are not in keeping with those in the manual on page 168 (my numbering) and that I would like to try less rigid forms of the template and perhaps ‘pig intestines’ which if placed in a set format will stay fixed when the animal intestines dry. I am thinking that I want to try some other forms of structures to broaden my experience of this exercise.

 
Comments Off on Part Four: Project Eight – Stage Two. Exercise Four.

Posted by on March 11, 2012 in Part Four: Project Eight - Stage Two. Exercise 4.


Part Four: Project Eight – Stage Two. Exercise Three

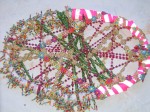
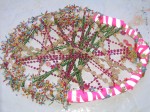
I see these exercises as craft based rather than telling a story. Saying that however discounts the fact that these pieces were not worked to a predefined pattern or kit that some one else had designed. They were merely ‘suck and see’ tasks: decide on a shape – oval. Use more rigid materials: bamboo bag handles parcel taped end to end. Think of the effect of light and space: interwoven yarns and fibres so that there were spaces where the light could shine through and the background could be seen between the materials. I should have photographed the object up against a black wall for a more tenacious visual impression.

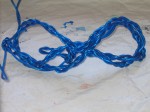
A different material such as hemp or flax or rope may have resulted in a better outcome for the ‘making a rope’ experiment’. The outcome helped me to understand the technique but the use of plastic covered wire did not allow the cord when released to twist back on itself ending up in a compact object.

I prefer to work from a visual source so that there is something to focus on and proceed towards. Using the imagination is a creative process in itself which draws on the background and experiences stored away in ones sub conscious. These exercise are a means to an end and that is the satisfaction that comes from persevering with the various techniques. To develop these tasks further colour, pattern, shape and organisation must be considered in order to raise the effort to that which has aesthetic appeal as well as the “WOW” factor.

 
Comments Off on Part Four: Project Eight – Stage Two. Exercise Three

Posted by on March 9, 2012 in Part Four: Project Eight - Stage Two. Exercise 3.


Part Four: Project Eight – Stage Two. Exercise Two.

Just the like the best shot in golf – I want to keep going back again and again and again. Very colourful but becomes more expressive as a larger sized cord is used and the fingers become quite nimble. Must try other materials the resulting textures and structures will be so exciting and pleasing to do.

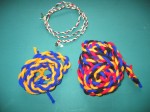
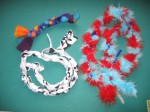
Playing with yarns fibres and fabric are exciting even if it takes two or three tries at getting compatibility between the different textile mediums. Plaiting become second nature because the pattern is repetitive even if it is hard on the back and concentration. Plenty of ‘get up and walk around’ helped to relieve the tension in the shoulders. Colourful aren’t they – primary of course and also the code colours of our regional rugby team. Fir up the nose leads to ‘ticklish’ behaviour – such as sneezing.

Repetition in the technique takes away some of the excitement and anxiety when working towards resolving a piece of work. It would seem that these constructions may not be the end in themselves so much as a means to an end. Once learned however the techniques become a resource stored within ones data base for later consummation.

 
Comments Off on Part Four: Project Eight – Stage Two. Exercise Two.

Posted by on March 6, 2012 in Part Four: Project Eight - Stage Two. Exercise 2.